Showing posts with label gardening. Show all posts

Thursday, September 20, 2012

Capturing the Garden's Fiery Fairies


The beauty of deep red cayenne peppers dangling from the stems of bright green plants would be reason enough to grow these hot little gems of the late summer garden. But that's just the first of the many gifts they offer. When wisely used, they can quickly turn a humdrum meal into an adventurous culinary escapade. When carefully preserved, they provide an easy way to add extra warmth to dishes on chilly winter evenings.

Cayenne peppers (CP) not only add great flavor and "kick" to our food; they can also contribute substantially to our health and well-being.  Here is a list of some of the numerous health benefits associated with cayenne peppers (adapted from the article "17 Health Benefits of Cayenne Pepper"):

1. Anti-Irritant Properties
  • CP  has the ability to ease stomach upset, ulcers, sore throats, spasmodic and irritating coughs, and diarrhea.
2. Anti-Cold and -Flu Agent
  •  CP aids in breaking up and moving congested mucus, thereby accelerating healing.
3. Anti-Fungal Properties
  • CP may effectively prevent the formation of fungal pathogens.
4. Migraine Headache Prevention
  • CP seems to be able to shift the brain's attention and thereby lessen the perception of pain.
5. Anti-Allergen Properties
  • CP may help relieve a variety of allergies.
6. Digestive Aid
  • CP aids in digestion by increasing the flow of enzyme production and gastric juices, thereby aiding the body in metabolizing food. It can also relieve intestinal gas, abdominal cramps, heartburn, and constipation.
7. Anti-Inflammatory Properties
  • These properties make CP helpful in treating arthritis, diabetes, psoriasis and herpes-related nerve damage.
8. Blood Clot/Heart Attack/Stroke Prevention
  • CP helps prevent the formation of blood clots. It also keeps blood pressure levels normalized and rids the body of LDL cholesterol and triglycerides. All of these contributions can help reduce the chances of a heart attack or stroke.
9. Joint Pain Reliever
10. Possible Anti-Cancer Agent
  • Several studies have suggested that CP has the potential to prevent certain kinds of cancer.
11. Weight Loss Aid
  • CP is both an appetite suppressor and a metabolic booster.
12. Toothache and Gum Disease Remedy
13. Topical Remedy
  • CP has been used to treat snake bites, rheumatism, inflammation, abrasions, and wounds.

During the past few weeks of harvesting, preserving, and nibbling on them, I have come to think of cayenne peppers as spunky little fairies, sent by the Fairy Queen to add an extra bit of festive vitality to the lives of human creatures. There really is nothing like a little dash of homemade cayenne-pepper sauce to rouse us out of the doldrums of everyday adult living. So why not head out to your local farmer's market, rustle up a few capsaicin-rich sprites, and concoct a zesty batch? Here's a simple recipe I came up with this summer:
Farmer Jennie's Hundred-Pepper Hot Sauce
Ingredients*:
100 red cayenne peppers
12 cloves of garlic
8 cups white vinegar
2 teaspoons sea salt

* This recipe can easily be halved, quartered, or doubled, depending on how many peppers you have.

Directions:
Wash and process your canning jars. (You will need eight 8-ounce jars for a batch this size.) Leave them in the canner and let the water simmer while you prepare the sauce. Also immerse the lids and bands in a pot of warm water, and keep it warm on the stove. 

Wash, drain, and gently dry the peppers. Remove their stems. Place the peppers in a stainless steel pot, and add the remaining ingredients. Bring to a boil over medium heat, then turn down the heat and let the mixture simmer until the peppers and the garlic are soft, stirring occasionally. Let the mixture cool slightly, then "liquify" it in a blender or a food processor. Run it through a finely meshed metal strainer. Return it to the pot and bring it to a simmer again. Turn off the heat. 

Pour the sauce into the prepared jars, leaving 1/2 inch of headroom. Wipe the sides and rims of the jars. Put on the lids and tighten the bands (just finger-tight). Immerse the jars in the water canner's boiling water and process for 10 minutes. Remove the jars and place them on a towel laid out on the kitchen counter for 24 hours; then check the seal. (If any of the cans are not sealed, refrigerate them or reprocess.)


Tuesday, August 21, 2012

Death in the Garden


As I've noted in previous posts, our first summer garden here at Little Bent Creek Farm has been surprisingly productive overall. We've reaped heaping piles of cucumbers; baskets full of green beans; volcanic eruptions of hot peppers; mountains of lettuce; enough basil for a 2-year supply of pesto; and more tomatoes than I've known what to do with. Of course, some of our plantings failed miserably and others did just fair. I had wondered whether I'd be able to grow celery here, and evidently I'm not (at least not yet). The spinach also flopped (I think I got it in the ground too late.) The corn and okra we got were delicious but the stalks grew way too high and produced much less than we would have liked (probably because of a lack of full sun in the area of the yard where the garden sits). The sugar snap peas did well at first but died off really quickly (damaged by an unknown garden pest), so we only enjoyed those for a couple of weeks. And the cabbage was fairly devastated by slugs.

All-in-all, though, our summer cup ranneth over.  Perhaps that is why I found myself a little surprised--and strangely sad--the other day when I walked out to the garden, looked at the cucumber bed (pictured above), and realized, "Oh my, the garden is dying." Why this took me aback I don't know. I've dug, planted, weeded, or harvested nearly every other day this summer--and some weeks, every day. I've witnessed up close the myriad changes the plants and the ground have gone through. But it hadn't fully struck me until that moment that this garden's days were nearing an end.

In some ways, it's almost a relief--no more rushing around to find new canning recipes, or freezing and drying guidelines. No more itchy arms from reaching inside the fronds of zucchini plants. No more wracking my brain to devise a chemical-free way to get the Japanese beetles away from the green beans. Well, at least not for a few weeks.

Dead vines composting into
nourishment for future plants

Goats and chickens feasting on
spent garden plants


In central North Carolina, gardeners are fortunate enough to be able grow vegetables, herbs and flowers the whole year round. So within a couple of days of hearing the garden death bell toll, I was busy tearing out plants and adding new compost to the spent beds, prepping them for late-summer and fall plantings. (The goats and the chickens have been loving this chore--gobbling up all the leaves, pods, fruit, and stalks I toss at them.) And already back in several of the beds where last week vines were shriveling are newly seeded beans, several different kinds of lettuce, collards, dill, brussels sprouts and broccoli. I hope to get around to planting a few more cool-weather crops this weekend.

Bed waiting for new seeds
So my grief over the death of my lovingly nurtured plants won't last long. And neither will my respite. Hopefully I'll soon be scrambling for recipes again and surfing the internet looking for new organic pest control ideas. In the meantime, I have acquired a new respect for the role that death plays in nurturing life. And--a harder lesson to absorb--a new appreciation for the fleeting nature of existence. For in broad historical perspective, how much difference is there between our own life spans than that of the cucumber plant? Remarkably little.


The Farmer, Speaking of Monuments
--Wendell Berry

Always, on their generation's breaking wave,
men think to be immortal in the world,
as though to leap from water and stand
in air were simple for a man. But the farmer
knows no work or act of his can keep him
here. He remains in what he serves
by vanishing in it, becoming what he never was.
He will not be immortal in words.
All his sentences serve an art of the commonplace,
to open the body of a woman or a field
to take him in. His words all turn
to leaves, answering the sun with mute
quick reflections. Leaving their seed, his hands
have had a million graves, from which wonders 
rose, bearing him no likeness. At summer's 
height he is surrounded by green, his 
doing, standing for him, awake and orderly.
In autumn, all his monuments fall. 

Friday, July 20, 2012

Progress on Several Fronts: Putting Up and Putting By


We've been doing a lot of "putting up" around the farm lately. One of the most exciting things we've put up was actually invented by our neighbor up the road, Frank Cardopoli. Frank, who has a great deal of experience in both farming and business, has designed a device that makes the lives of chickens and their owners much more pleasant, particularly during the hot, dry days of summer. Called "The Chicken Fountain," it provides fresh, clean water to a flock 24/7--no more daily emptying, filling, or cleaning out that icky, slimy stuff that seems to collect constantly inside conventional chicken waterers.

Frank was kind enough to donate one of his Fountains to our farm, and even came (with his daughter, two sons, and niece) to help us install it. Now that's my kind of neighbor!  Below is the story of The Chicken Fountain, as told by Frank on the product's website, www.chickenfountain.com (where you can find more detailed information about the Fountain and how to purchase one for yourself!).
I love having backyard chickens but hated the task of cleaning the water bowls and refilling them. Vacations were hard to plan because finding people that were available to keep the chickens watered was not easy. Summers were the worst because the chickens needed more water and the water in the dish would evaporated more quickly due to the heat. Not to mention how unhealthy it was for our dogs, goats and other farm animals to drink the water that was full of bird droppings! I set my mind to build a system that was easy to install, provided a constant flow of clean water, and was completely maintenance free. I spent many nights in the barn working on this concept and, quite frankly, failed a number of times. Then it hit me! Why not just make a passive flow unit that could be hooked up to the garden hose?? There wouldn't be pressure regulators to fail, no start up high pressure, no manually refilling buckets...Just cool, clean water every time the chickens went to drink. I finally perfected the unit and felt so strongly about it that I wanted to make it available to every flock owner that hates cleaning the mess of dirty, unhealthy water dishes.
Our growing flock is not only now happily hydrated, but also newly protected. For among the other things we've put up at the farm lately are a secure chicken run (off the coop) and extra electric wiring (on the barnyard fence). We weren't expecting to have to make these improvements--that is, until a fox came along a few months ago and started picking off our laying hens. If you've been reading this blog for a while, you might recall the first couple of fox attacks we endured. At that point, we suspected that a coyote might the culprit, but as our diner became more and more bold, s/he began showing up all hours of the day, standing on the other side of the barnyard fence and peering in, just waiting for our hens (who were now being locked in the coop most of the time, poor dears) to show their delectable selves. If we ever did make the mistake of leaving the hens out while we popped back into the house for lunch or a rest, we were likely to regret it. Altogether, we lost 14 hens.


As lovely as the girls and I consider foxes to be, and as happy we are that beings wild and wooly still wander the forests near our home, this was not a tolerable situation. To the rescue came another helpful neighbor, Tom Tevepaugh. He suggested that we call an acquaintance of his, J.R. Troyer, to ask if he could build a run for the hens and reinforce our fencing at a reasonable cost. J.R. came out almost immediately, talked with us about what we wanted, gave us a good price for the work we agreed upon, and returned within a few days, bringing with him his assistant, Moses. They worked hard and did a beautiful job. G-P added still more security by extending the extra wires J.R. and Moses along strung along the top of the barnyard fence to cover all of its 5 gates. And now not only are our laying hens again happily roaming freely, but we have also been able to let the young chickens (now 10 weeks old) out to free-range as well. What a relief it is to have our tranquilly lively, cluck-cluck-clucky barnyard back.


While the guys were out building and wiring, the girls and I were doing some belated "spring cleaning" in the barn. The stall where the young chickens have been for 6 weeks or so now had gotten pretty rank, and the heat of the summer had turned the place into quite an odoriferous nightmare. The same goes for the goat and donkey stalls. So out went the old, nasty wood chips and hay, and in came nice, fresh bedding. Walls, water buckets, and feeders also got scrubbed down. The blisters and sore muscles I gained from all the shoveling, hauling and scrubbing were made well worthwhile by that nothing-so-sweet (and nothing-so-short-lived!) smell of fresh barn stalls. Mmmmm.


I've also been spending quite a bit of time "putting by." So far this summer, I've made several batches of strawberry jam, a couple of batches of blackberry jam, and for the first time ever, blueberry jam.  In each case, the girls and I have been fortunate to find organically grown (or in the case of the blackberries, wild) berries to pick right here in the Davidson area. (In addition to the jam, the blueberries contributed to some wonderful muffins; you can find the recipe for them below.) We've also been blessed with LOTS of cucumbers from our garden. So I have canned three different kinds of pickles: spicy kosher dill, garlic dill, and bread and butter. The bush beans also did well this year, so several packets of those went into the freezer. Next week I hope to start canning tomatoes, marinara sauce, and maybe some homemade ketchup. These will be new adventures for me, so I'm sure there are some surprises ahead. (Hopefully none of them will be quite as trying as when I completely botched the water bath for one batch of pickles, had a jar break into a billion bits in the middle of the next run, and--during the final effort of the day--had a lid go magically floating off another jar, once again mucking up the entire water bath with its contents! I was not a happy canner.)


The herbs have also done pretty well this summer--especially the basil! It's been just lovely. In fact, I've discovered a new summer pleasure: making basil bouquets. As aromatic as they are lovely, they compliment a table set with garden-fresh food like nothing else. I have made lots of pesto, as well as some basil sauce (without the nuts and cheese). I store these sauces by dividing each freshly made batch into ice cube trays and then freezing them. I store the frozen cubes in resealable plastic bags and then can use just as many as I need (and it rarely takes very many) to finish a veggie, fish or pasta dish during the months when fresh herbs are hard (or expensive) to come by.


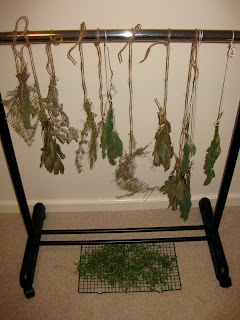
The oregano, thyme and dill have yielded generously, as well, and the rosemary has done fairly well. Besides using all of these now to flavor our summer dishes, I have started drying them in a storage closet upstairs, along with some sage and extra thyme from yet another kind neighbor. Drying herbs yourself is ridiculously easy to do, and the result is much tastier (and certainly cheaper!) than the stuff you'll get from the baking aisle of the grocery store. To do it, just clip your herbs with a good bit of stem (or buy them this way at your local farmers market). Gently rinse off any dirt that may be hiding in the leaves and then air dry them on a towel. Once they are no longer damp, gather the stems into several small bunches and tie them at the bottom, using a foot or so of twine or string. Take these to a dark, dry, low-traffic room in your house and hang them upside down for a week or two, until the leaves feel dry and crumbly when you touch them. (Making sure there is no moisture left in the leaves will ensure that they stay good during the coming months.) Remove the leaves from the stem and crush them as finely as you like. Store them in small plastic bags or glass spice jars. Voila!--you've got the makings of delicious dishes for months to come.

Are their some things you especially enjoy "putting up" or "putting by" during the summer? If so, feel free to share them here. In the meantime, I leave you with recipes for a couple of the items I've mentioned above. Hope you enjoy!


(Adapted from www.epicurious.com. Original recipe written by Eleanor Topp and
Margaret Howard, published in The Complete Book of Year-Round Small-Batch Preserving.)


I doubled this recipe, and it worked fine. In some jars, I used small whole cucumbers, in some thick slices, and in others larger cucumbers cut lengthwise into spears. To a few of the jars, I added some crushed red pepper. You could also add a whole hot pepper to each jar, if you also like your pickles zesty. I hope to try that once the cayenne ripen!

Ingredients:
8-10 small pickling cucumbers (about 3 pounds)
2 cups white vinegar
2 cups water
2 tablespoons pickling salt
4 heads fresh dill or 4 teaspoons dill seeds
4 small cloves garlic

Directions:
1. Prepare a boiling water bath* and sterilize 4 pint jars in the bath. Leave them in the bath to stay warm. Immerse the the lids and bands in warm water. 
2. Cut a thin slice from the ends of each cucumber
3. Meanwhile, combine vinegar, water, and salt in a saucepan and bring to a boil.
4. Remove hot jars from canner. Place 1 head fresh dill or 1 tsp dill seeds and 1 clove garlic into each jar. Pack in cucumbers. Pour boiling vinegar mixture over cucumbers to within 1/2 inch of rim (head space). Apply the lids and screw on the bands. Process 10 minutes for pint jars and 15 minutes for quart jars in the boiling water bath.

Yield: 4 pints

*You can find easy instructions on how to can using a boiling water bath at the Simply Canning website.


Blueberry Buttermilk Muffins
Ingredients:
2½ cups all-purpose flour
1½ teaspoons baking powder
½ teaspoon baking soda
¾ cup sugar
¼ teaspoon salt
2 large eggs, beaten
1 cup buttermilk
½ cup (1 stick) butter, melted and slightly browned
1½ cups blueberries (preferably fresh, but frozen are okay)
2-3 tablespoons sugar for sprinkling on top of muffins (optional)

Directions:
Preheat oven to 400°. Grease (preferably with butter) 24 muffin cups. Sift the dry ingredients together in a large bowl. In another bowl, whisk the eggs, buttermilk and butter. Make a well in the dry ingredients and pour in the liquid ingredients, mixing gently and quickly. Very gently fold in the berries. (If using frozen berries, coat them in a tablespoon or two of all-purpose flour before adding them. Shake off any excess flour.) Spoon the batter into the greased muffin cups. If desired, sprinkle each muffin with a bit of sugar. Bake until golden brown, between 20 and 30 minutes.

Yield: 20-24 muffins.

(You can also bake this batter in small loaf pans. When doing so, I decrease the oven temperature to 375° and, of course, extend the baking time.)


Tuesday, July 3, 2012

Harvest Time


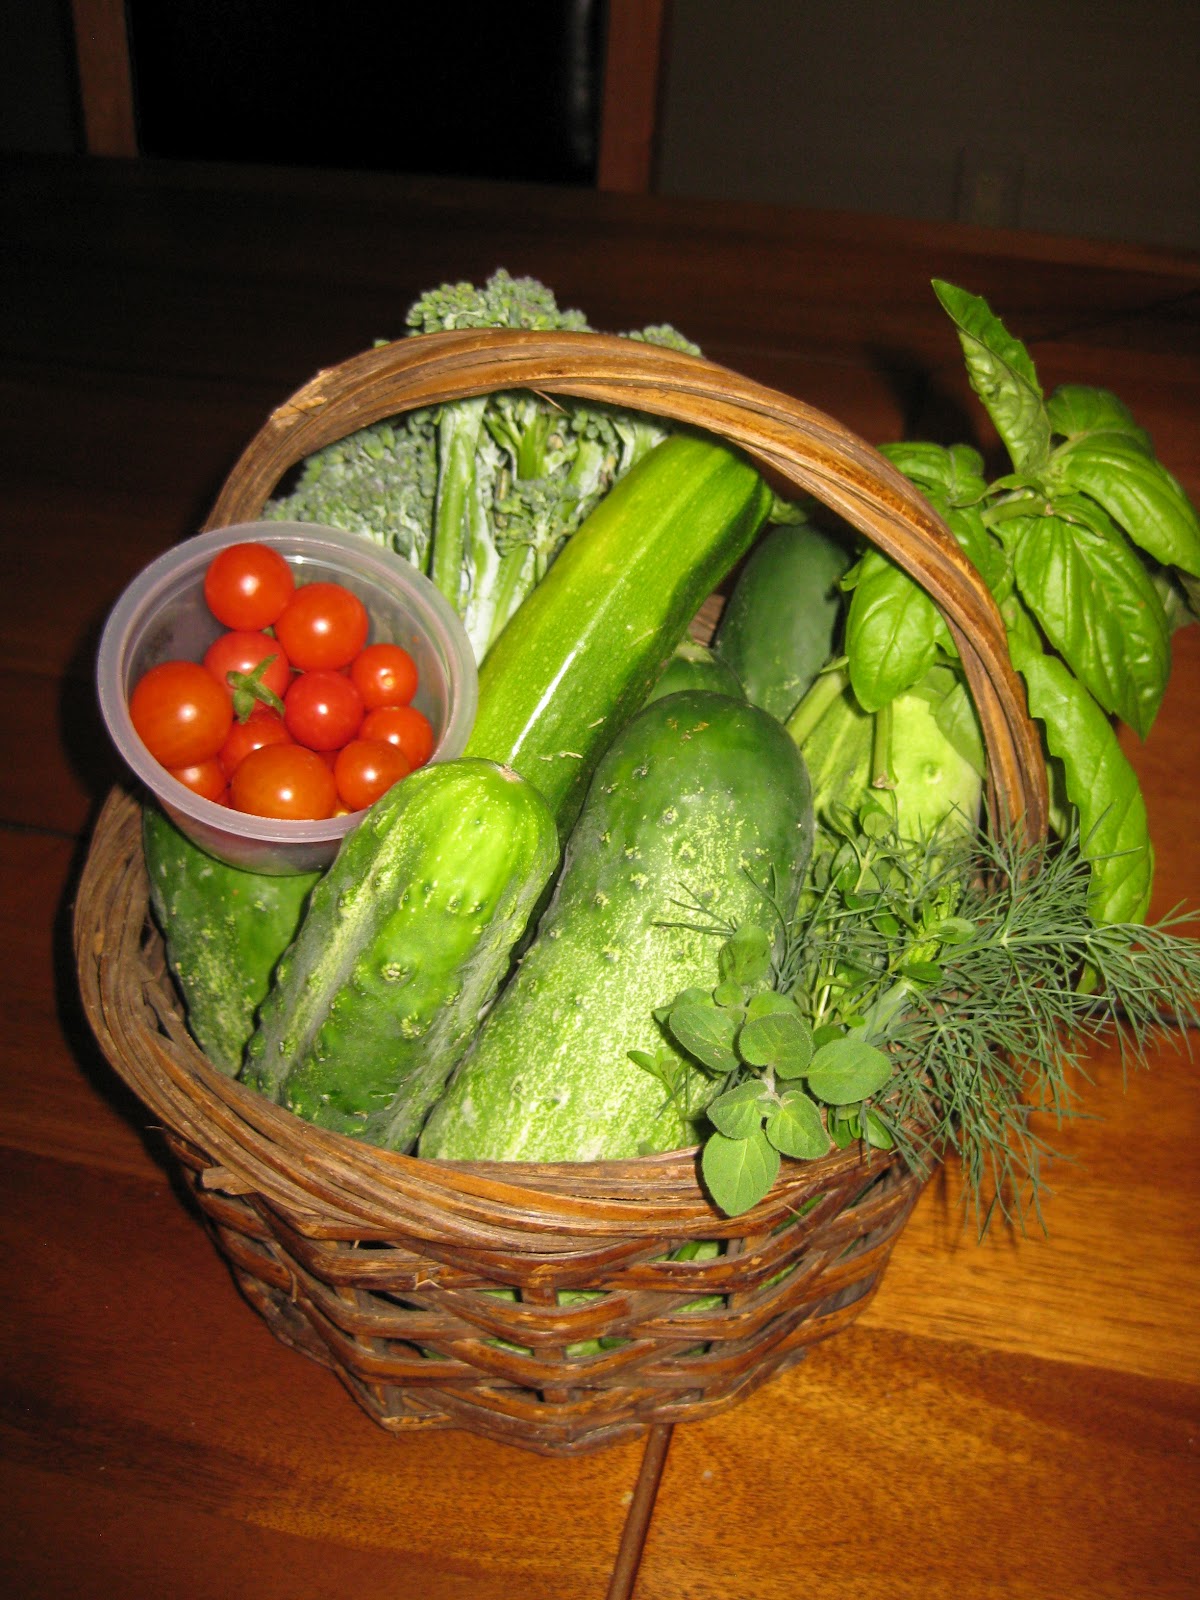
A bountiful basket

The Harvest
-Franca de la Pena

Golden sheaves stand ripening
in the setting sun
Bounty of a fruitful harvest
A year's labor well spent.

From tiniest seed to trees laden
with sweet promise
The earth gives forth her joy in abundance.


It's hot. Really hot. The mercury hit 102 in Davidson on Saturday. And today looks like it's going to be in the upper 90s. Doing the chores in the barn is now a sweaty, stinky enterprise, even in the early mornings and late evenings. Summer has descended upon us, and it looks like she's here to stay.

Inca Jewel Sunflowers line the garden fence.

But we're not complaining. Not for a second. For alongside summer's heat come the biggest, best harvests of the year. Baskets of sweet peas; bunches of deep-green broccoli; bowls of salad greens; mounds of juicy cucumbers; bouquets of cheery zinnias, sunflowers, and marigolds; bags of okra spears; aromatic bunches of basil and sprigs of oregano, dill, parsley, mint, and thyme; platters of tender bush- and pole beans; and of course, enough zucchini to feed two armies. These are some of the things we have harvested so far here at Little Bent Creek Farm. And there is still much to look forward to: the carrots, corn, onions, celery, leeks, and peppers have yet to fully mature.

Romaine and Slobolt Lettuce have fed us for weeks.
Heinz Paste Tomatoes slowly ripen on the vine.

Every trip out to the garden these days is an exciting adventure. "Look, mama, look!" the girls exclaim, "The okra is ready to pick!" "This green bean is so long!" "Mmmmm . . . these peas are sweet!" "Ouch! That cucumber is prickly!" Although I've enjoyed harvesting produce from the gardens I've had in the past, I had never had nearly as much fun at it as I have this year. For this year, I've gotten to share in my girls' elation as they see the plants they helped start from seed, transplant, water, and weed now offer them mouthfuls of pleasure and fulfillment.

Yellow Dent Corn towers over the Three Sisters plot. 
Danvers Carrots form sweet fingers underground.
And it's all just so pretty. Truly, does anything beautify a kitchen counter more dramatically than a basketful of freshly picked garden produce? Or a row of canning jars filled with the fruits of one's own labor? I don't think so.

Recently canned strawberry jam, blackberry jam, and kosher dill pickles


Zinnias and zucchini 
No matter what economic challenges or limitations she may be facing, a gardener in the midst of the harvest season is rich. To be able to nourish your family with food you've grown yourself is to know a kind of wealth that cannot come from earning a wage. It is the sort of wealth that one immediately wants to share rather than horde (especially when it comes to the zucchini!); a kind of wealth that instills humility and awe rather than pride. It is a kind of wealth that makes one want to whisper prayers of gratitude all day long, . . . and to never ever complain about the heat.

Monday, April 23, 2012

Tough Love in the Garden

The miracle of the seed and the soil is not available by affirmation; it is only available by labor.  
~Jim Rohn

It is utterly forbidden to be half-hearted about gardening.  You have got to love your garden whether you like it or not. 
~W.C. Sellar & R.J. Yeatman, Garden Rubbish, 1936


On April 10 around sunset,  I walked out of the garden, secured the fence, and turned around to take one final look. I sighed with relief as I took in the 20 lovely (if not entirely straight or level) planting beds surrounded by hay-covered walking paths. I was exhausted. Beat. Sore. And I hadn't yet planted a single thing.


Just a few weeks after getting settled into our new home last fall, I began working on converting the largest bit of yard on our property into a garden plot. First, I cut and laid over the grass the cardboard boxes that had carried our stuff here from Ohio. Then I asked our neighbor, Tom, to bring in some composted cow manure to put on top of it, and finally, sowed winter rye seeds in the compost to provide a nitrogen-fixing, weed-inhibiting cover crop. Then I let it sit . . . and sit . . . and sit.  As the rye took root, the cardboard decomposed, and the earthworms munched, I perused seed catalogs and dreamed of eating homegrown tomatoes and bush beans.


This February I began to do the real work of preparing the plot for planting. It turned out to be harder than I thought to till the rye, compost and cardboard into the clay soil that lay beneath it. I started out using only my mattock, and had worked about a third of the way through the 1250 square-foot plot by the time my husband, G-P, came out to lecture me on the silliness of rejecting modern conveniences and to insist that we put to work the motorized tiller my twin sister had loaned us. So we finished the plot in style--and boy, was it easier! Little did I know that I had just gotten started.


Gardening is a matter of your enthusiasm holding up until your back gets used to it.   
~Author Unknown

I soon realized that the tiller had just barely scraped the surface of the clay, and that I therefore needed to dig a good bit deeper. So we called Tom again, and one afternoon while the girls and I were at the library, he brought over his tractor and plowed it up. Once again, I'd assumed that this would do the trick. But when we got back, I saw that the plowing had left behind a plethora of small, large and HUGE clumps of clay soil--many of them as hard as rocks. Seriously--they were as hard as rocks. I know all you native North Carolinians out there are laughing. But I was stunned. And beginning to get discouraged.

Back I went, mattock in hand again. It took me another several afternoons of work to get the large clumps and huge clumps broken into smaller clumps and to smooth everything out to some resemblance of level. But it still didn't look anything close to arable.


So we ordered 8 more yards of compost. They hauled it in on a Sunday afternoon. After another week of labor (and some help from G-P and the girls), I had the compost spread and worked in. Thankfully, G-P was kind enough to take charge of deciphering and installing the portable electric fence we'd ordered. After it was in place, the girls and I spent several hours measuring and demarcating the 20 planting beds. (I decided not to make framed raised beds but rather informal ones that I could later shift if I needed to--which, of course, didn't stop G-P from pointing out that gardeners back in Nigeria never measure their beds at all, and the plants grow just fine.) A couple more of afternoons of raking and spreading hay, and they were all ready. It was done. I was finally ready to plant.


If all this sounds as ridiculous to you as it sometimes seemed to me, you might consider this fact--endlessly repeated in nearly all the literature on organic gardening: soil preparation is the most important step to creating a healthy, productive garden.  As Marion Cran put it, "If I want to have a happy garden, I must ally myself with my soil; study and help it to the utmost, untiringly. Always, the soil must come first." Rich organic soil attracts beneficial insects and discourages pests; provides long-term nourishment without the need for expensive (and potentially harmful) fertilizers; and produces vegetables and herbs with higher levels of vitamins and minerals than conventional, chemical-infused farming. (I have to admit that keeping all this in mind was about the only thing that got me through a few of those afternoons.)

After all the soil prep, planting has seemed like a stroll in the park! So far the girls and I have put in (as transplants we grew indoors, or as seeds):
Lettuce
Spinach
Carrots
Tomatoes
Cabbage
Broccoli
Onions
Leeks
Zucchini
Bell peppers
Bush beans
Sunflowers
Oregano
Parsley
Thyme
Rosemary
Asparagus
Basil

 Soon to follow in their footsteps will:
Habanero peppers
Bush beans
Cayenne peppers
Pole beans
Cucumbers
Chamomile
Celery
Several different kinds of flowers

In parenting, I have come to think of true "tough love" not as a kind of love that is hard on the child, but the kind of love that challenges the parent to reach deep inside herself and find those reserves of strength and patience that will allow her to accept and nurture instead of spurn and demean. It is often very tough indeed. And humbling. Perhaps loving our gardens is also an adventure in tough love; goodness knows it is humbling. But (again, like parenting) it is beautifully--and often surprisingly--rewarding, too. Even though the only fruit of our labor we've enjoyed so far is seeing the broccoli plants gain a half-inch in height and the first bits of green poke their heads out of the spinach and lettuce beds, it has already been worth all the work. That's how it is with labors of love.

Tuesday, March 20, 2012

Seed Starting Time: Enticement and Tips


If the gardeners in your life seem to have a special twinkle in their eyes or an extra spring in their step during the next few weeks, it may have something to do with the fact that the moment we've all been waiting for has arrived. Finally--after all those months of drafting garden layouts, sharpening tools, buying supplies, and waiting, waiting, waiting--the time has finally come to sow some seed. Is there anything more exciting than popping seeds into soil, or more magical than seeing tiny green stems emerge a few days later? Not to most gardeners.

The girls and I are attempting to grow all our own transplants this year. In the past, we have purchased at the garden center most of those delicate damsels that like to be spend their first few weeks indoors before being thrust into the none-too-gentle arms of mother nature: tomatoes, peppers, onions, cabbage, leeks, and a variety of flowers and herbs. But this year we decided to be bold and try raising them from seed. And why not, since we're getting quite used to diving head-first into new waters! In the following paragraphs, I share some of the discoveries we've made.

First, a few of the reasons that we (and many other gardeneres) have chosen to start our own seeds:
  1. Seeds are much less expensive than transplants.
  2. It is often hard--if not impossible--to find organically grown and heirloom transplants.  
  3. The variety of vegetables, herbs and flowers that you can find in seeds catalogues is much greater than what is available at most garden centers.
  4. It's fun!
The fun of starting your own seeds actually begins well before spring. In fact, almost as exciting to gardeners as popping those first few seeds into soil during the first few days of spring is cozying up in the depths of winter with a good seed catalogue. There are some out there these days that make for better reading than New York Times bestsellers. While a number are glossy and exquisitely laid out, others charm not with appearance but with poetic description--depicting their wares in terms that leave your mouth watering and your hands itching for a pair of garden gloves. Among my own favorites (all offering organic and heirloom selections) are:

Once you have your seeds ordered, it is time to figure out where they will begin their fragile little lives and how to provide adequate heat and lighting for them. It's convenient to buy a set of grow lights at your garden center, your hardware store, or online, but plain-old florescent bulbs work fine, too, as long as you rig them up so that you can raise and lower them above the seedlings. Since seeds won't germinate if they are too chilly, you'll either need to find a warm corner in your house where you can set up your grow lab or--if you're using a garage or another somewhat chilly space--you can purchase heating mats.
You'll also need to buy or make the following:
  • Seed-starting mix (do not try to use potting soil, no matter how tempting it might be)
  • Small pots (easy to find in stores but may also be made from yogurt cups, disposable drinking cups, or newspaper--there are many great ideas online!)
  • Leak-proof trays
  • A watering can and spray bottle
  • A bucket.

Now you're ready to go. First empty the seed-starting mix into a bucket and wet it thoroughly. After letting it sit for a while to absorb the water, scoop the mix into your pots. (Make sure there is a hole in the bottom of each one so that water can drain from the soil.) Plant the seeds according to the directions on each seed packet, and cover with plastic until the seeds have sprouted. Don't forget to label what you've planted! Believe me: you won't remember them all when they begin sprouting--seriously. (Old-fashioned popsicle sticks work great for this, by the way.)


You don't need to turn your grow lights on until the seeds have sprouted. As soon as they have, remove the plastic cover and leave the grow lights on around 16 hours a day or so. (Some experts say you can leave them on all the time, but that just doesn't seem natural to me.) If you have a hard time remembering to turn the lights off and on, you can get a timer for a few bucks at your local hardware store.

Keep the soil in the pots moist but not soaking wet. (It's best to water them from underneath by pouring water into the trays and letting the soil in the pots soak it up.) Raise the lights as the your seedlings grow, keeping it 2-3 inches from the tops of the plants. After a week or so, let a fan blow on them for several hours a day so that they can begin adapting to the wiles of the weather they'll soon face. When the seedlings have several leaves, thin them out and/or transplant them into bigger pots. As the time nears when you'll be putting them into the ground outside (again, your seed packets should tell you when that is), you'll want to "harden them off"--that is, move them outside for several hours a day so that they can acclimate before being put into the ground.

That's about it. Of course there are much more detailed directions in the thousands of gardening books and zillions of gardening websites out there. Consult as many as you can to learn about different approaches. Then, using all the advice that sound right to you, give it a try.

I think you'll find that no matter how many seeds you pop in the ground, the first time you see each one sprout is awe-inspiring--another one of the common yet inconceivable miracles involved in nurturing living things. Happy planting!

The Little Seed
--Kate Louise Brown

In the heart of a seed
Buried deep, so deep
A tiny plant
Lay fast asleep.

"Wake!" said the sunshine
And creep to the light
"Wake!" said the voice
Of the raindrops bright

The little plant heard
And it rose to see
What the wonderful
Outside world might be!

Wednesday, March 7, 2012

Shrooming in the Shade

I love trees. My husband loves trees. My daughters love trees. So in many ways the property where we are now living is perfect for us. There are lots of trees here. But those trees are also making it challenging to farm. They limit the space we have for growing hay in our pasture. And they limit how much gardening I can feasibly do. This was the biggest compromise I had to make as we made the decision to buy this place last summer. And I continue to struggle with it. Before leaving Ohio, I had envisioned having a HUGE Southern garden: rows and rows of tomatoes, corn, beans, lettuces, pumpkins, sweet potatoes, and onions; a spectacularly wild array of flowers; and enough herbs to last throughout the year. But here I am, standing in front of the only little corner of our property that is even remotely capable of getting enough sun for blooming plants (it was a corner of the yard before we got here), wondering if I will be able to pull off even a small patch of veggies.

(from www.mushroommountain.com)
Determined not to keep longing for the landscape of my dreams, I've decided instead to get creative in working with the landscape we have. I hope to plant a variety of native perennials around the house; scatter trillium, wild ginger, bloodroot, and spring beauties in our little plot of woods; and use the mountains of sticks and leaves we have to generate extra-rich mulch. And I'm going to grow mushrooms. Perhaps I'd better say I'm going to try to grow mushrooms. Once again, I really don't have any idea what I'm doing.

Mushrooms are wonderful little beings. The fleshy edible fruit bodies of fungi, they are surprisingly nutritious. Low in fat, carbohydrates, and calories, they are a great source of B vitamins and essential minerals such as selenium, copper, and potassium. When exposed to ultraviolet light, they are also high in Vitamin D, something many of us North Americans are needing more of these days as we spend more and more time indoors. And if that's not enough, as my children have reminded me, they also attract fairies and elves! It's not surprising, then, that mushrooms have been harvested in the wild and cultivated by humans for at least a few thousand years. (Edible mushrooms have been found in 13,000 year old ruins in Chile, though the first solid evidence of mushroom consumption dates back to several hundred years BC in China.)

Not that long ago, many rural Americans could take a walk through a forest and gather several types of edible mushrooms to bring back for the supper table. (The same was true where my husband grew up in Nigeria, he says.). These days, though, mushrooms are among those foods that most of us--even most gardeners--assume we need to buy at the store. In fact, gathering them wild can be dangerous without a good deal of knowledge and training. But a few weeks ago, I started wondering if it's really true that I have to pick up a plastic-covered styrofoam box every time I need some fungi in my stir-fry. After all, these quirky little creatures do grow all over the woods, often popping up in what seem like the most unlikely places. So how hard could it possibly be to cultivate them? I have to admit that researching mushroom cultivation left me feeling pretty intimidated at first: lots of talk about sterilization, mycelium formation, moisture gauges, temperature sensitivities, etc., etc. But after some digging, I discovered that there are a few types of tasty mushrooms that gardeners like me seem to be able to grow with relative ease.

The one I chose to try is Stropharia rugosoannulata, commonly known as Wine Cap or King Stropharia. It grows wild in forests throughout the United States and has a lovely red, brown or tan cap that can sometimes reach the size of a dinner plate (!) but more commonly grows to around 2-5 inches across. It is evidently delicious when sauteed, broiled, or baked and is exceptionally good for you. Attractive as all these traits are, the deciding factor in my choice to cultivate wine caps was that they love wood chips. And we have lots of wood chips lying around these days. In fact, I had two large piles of sweet gum chips sitting right beside the little garden plot I mentioned earlier--under some trees at the edge of the woods (and thus in what seemed like a perfect spot for a mushroom bed). So I got online and found the website of Mushroom Mountain, a mushroom farm in Liberty, South Carolina. The nice folks there confirmed that wine caps would be a good variety for me to try, so I sent off for a bag of spawn. It arrived on our doorstep two days later.

To prepare the beds, I spread a layer of cardboard and newspaper on the ground between the two wood chip piles. Then I added a good amount of chips, leveling them out with a rake. Next, I scattered about half of the spawn I'd received over those chips and gently mixed them in. I then added another layer of newspaper, another layer of chips, and the rest of the spawn. Finally, I covered the finished bed with a layer of rotting leaves (to protect the chips from drying out and keep the mushrooms from freezing when the weather turns cold). Jeepers; that wasn't so hard.


Of course, I won't know for quite a while if this new venture into the world of mushroom gardening has been successful. It will be several months--maybe more--before the mushrooms can be harvested. In the meantime, all I have to do is keep shooing away the chickens (it took all of about 7 minutes for them to discover this new dining venue); remember to water occasionally; and dream quiet, delicious dreams of nibbling fresh, homegrown mushrooms.

Mushrooms
--Sylvia Plath

Overnight, very
Whitely, discreetly,
Very quietly

Our toes, our noses
Take hold on the loam,
Acquire the air.

Nobody sees us,
Stops us, betrays us;
The small grains make room.

Soft fists insist on
Heaving the needles,
The leafy bedding,

Even the paving.
Our hammers, our rams,
Earless and eyeless,

Perfectly voiceless,
Widen the crannies,
Shoulder through holes. We

Diet on water,
On crumbs of shadow,
Bland-mannered, asking

Little or nothing.
So many of us!
So many of us!

We are shelves, we are
Tables, we are meek,
We are edible,

Nudgers and shovers
In spite of ourselves.
Our kind multiplies:

We shall by morning
Inherit the earth.
Our foot's in the door.